Dunkirk: The Construction of a Myth and the Anatomy of a Naval Miracle, May–June 1940
Executive Summary
The evacuation of the British Expeditionary Force (BEF) and elements of the French First Army from Dunkirk (Operation Dynamo, May 26 – June 4, 1940) stands as a singular anomaly in military history: a catastrophic operational defeat that was transmuted into a strategic victory through logistical improvisation and coalition sacrifice. While popular history often relies on the romantic narrative of the “Little Ships,” the evacuation was, in reality, a triumph of professional naval staff work, a consequence of German operational overextension, and the result of a brutal attrition battle fought by the French rear guard.
This article provides an exhaustive analysis of the campaign. It dissects the breakdown of the Allied command structure under the Weygand Plan, the precise mechanics of the Halt Order (Anhaltebefehl), the physics of the naval lift across three divergent sea lanes, and the statistical reality of the air war over the Channel. Furthermore, it examines the “disarmament” of Britain—the total loss of heavy equipment—and the geopolitical maneuvering by Winston Churchill to utilize the evacuation as a lever to consolidate political power and reject a negotiated peace.
1. Strategic Context: The Collapse of the Coalition Command
To understand Dunkirk, one must analyze the disintegration of the Allied decision-making loop in late May 1940. Following the German breakthrough at Sedan and the “Race to the Sea,” the Allied armies in the north (Belgium) were severed from their supply lines in the south (France).
1.1. The Failure of the Weygand Plan
On May 19, General Maxime Weygand replaced Maurice Gamelin as Supreme Commander. Weygand immediately cancelled Gamelin’s orders and proposed a counter-offensive: the French First Army would strike south from Cambrai, while the French main body would strike north from the Somme, pinching off the German “Panzer Corridor.”
-
The Ypres Conference (May 21): The plan effectively died at the Ypres Conference. King Leopold III of Belgium declared his army incapable of offensive action. General Lord Gort, commander of the BEF, realized that the French forces in the south were disorganized and stationary.
-
Gort’s Unilateral Decision: On May 25, facing the collapse of the Belgian flank, Gort made the most critical decision of the campaign. Without consulting the French (and technically defying orders), he ordered the BEF to abandon the counter-attack at Arras and withdraw to the coast. This unilateral action saved the British Army but doomed the Franco-British alliance on the continent.
1.2. The Geography of the Trap
The withdrawal compressed the Allied forces into a coastal strip roughly 30 miles long and 15 miles deep, centered on the port of Dunkirk. This area, largely reclaimed marshland (The Moëres), was crisscrossed by drainage canals. While these canals hampered movement, they also provided ready-made anti-tank ditches, allowing the British infantry to establish a viable perimeter against the German armor.
IMAGE SUGGESTION 1
Subject: Detailed Map of the Dunkirk Perimeter (May 28, 1940)
Description: A tactical map showing the specific locations of the British corps (I, II, and III Corps) and the French sector, shrinking day by day.
Caption: “The Cauldron: By May 28, over 400,000 troops were compressed into a narrow coastal strip, defended by a thin crust of infantry along the canal lines.”
2. The German Halt Order: Anatomy of a Controversy
The survival of the BEF is inextricably linked to the German “Halt Order” of May 24, 1940. Often attributed to Hitler’s whimsical intervention, the order actually originated from military prudence at the operational level.
2.1. The Panzer Crisis
By May 23, General Gerd von Rundstedt, commanding Army Group A, halted his Panzers. His reasons were threefold:
-
Mechanical Attrition: After two weeks of continuous advance, the Panzer divisions had lost up to 50% of their operational strength. Tracks were worn, engines needed overhauls, and fuel was low. Rundstedt needed to preserve his armor for Fall Rot (the conquest of the rest of France).
-
Terrain Analysis: The Flanders terrain around Dunkirk was unsuitable for heavy armor. The soft, marshy ground and the network of canals meant that tanks would be road-bound and vulnerable to anti-tank fire.
-
The Flank Anxiety: The shock of the British counter-attack at Arras (May 21) terrified the German High Command (OKH). They feared another Allied strike on their exposed southern flank and wanted to consolidate before the final push.
2.2. Hitler and Göring’s Intervention
Hitler visited Rundstedt’s HQ on May 24 and validated the halt. Simultaneously, Hermann Göring, head of the Luftwaffe, intervened. Göring promised that his air force alone could annihilate the trapped army, rendering a costly ground assault unnecessary.
-
Directive No. 13: This order shifted the strategic center of gravity from the Heer (Army) to the Luftwaffe. This 48-hour respite (the order was rescinded on May 26) allowed the British III Corps to fortify the western perimeter, preventing the Germans from cutting the BEF off from the sea.
IMAGE SUGGESTION 2
Subject: Flanders Canal Network Terrain
Description: A photo of the marshy, canal-crossed terrain south of Dunkirk.
Caption: “Tank Trap: The drainage canals of Flanders were deemed unsuitable for armor by Rundstedt, prompting the operational pause.”
3. Naval Logistics: The Physics of Operation Dynamo
The evacuation was managed by Vice-Admiral Bertram Ramsay from the Dynamo Room in the cliffs of Dover. It was a logistical operation of immense complexity, dealing with tides, mines, and air attacks.
3.1. The Problem of the Beaches
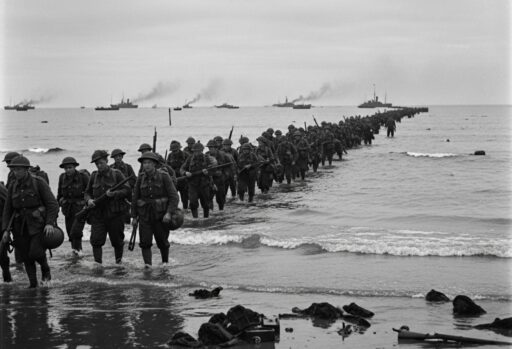
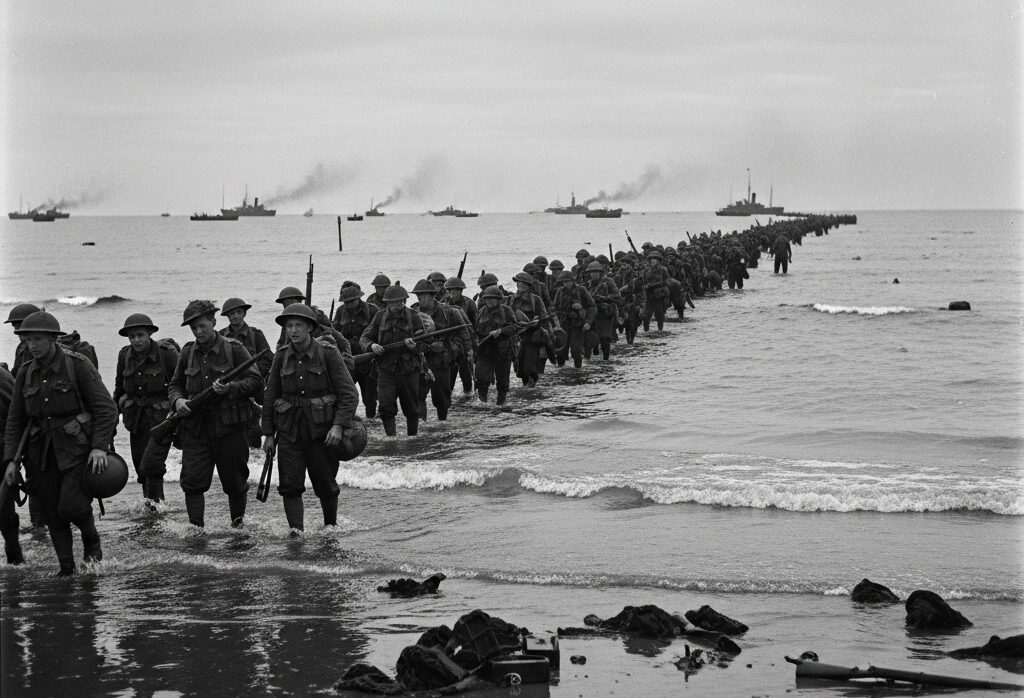
Dunkirk’s harbor facilities were largely destroyed by German bombing. The beaches shelving was extremely shallow (gradient 1:300). A destroyer drawing 10 feet of water had to anchor nearly a mile offshore. Loading troops via small boats from the beach was agonizingly slow; on the first day (May 27), only 7,669 men were lifted.
3.2. The East Mole Solution
The breakthrough came with the utilization of the East Mole. This was a 1,600-yard-long wooden latticework breakwater, topped with a narrow plank walkway. It was designed to direct tidal currents, not to dock ships.
-
The Gamble: Captain William Tennant, the Senior Naval Officer ashore, tested the depth and realized destroyers could come alongside. He ordered the ships to berth.
-
The Result: The Mole became the artery of the evacuation. 239,555 troops (approx. 70% of the total) were lifted directly from this fragile wooden structure. At peak efficiency, a destroyer could berth, load 600-900 men, and depart in 45 minutes.
3.3. The Three Sea Routes
Ramsay had to manage three distinct sea routes across the Channel, balancing speed against safety:
-
Route Z (39 nautical miles): The shortest route. It ran along the French coast but was under direct fire from German artillery at Calais. It was abandoned during daylight hours after May 29.
-
Route X (55 nautical miles): This route crossed the central Channel banks. It was safer from artillery but was heavily mined and difficult to navigate due to shoals.
- Route Y (87 nautical miles): The longest route. It took ships northeast toward the Kwinte Whistle Buoy before turning west. This doubled the transit time (4 hours one way) but was free from shore batteries.The constant shifting of convoys between these routes based on German interdiction patterns was a masterclass in dynamic naval command.
IMAGE SUGGESTION 3
Subject: The East Mole at Dunkirk (Aerial View)
Description: An aerial reconnaissance photo or diagram showing the long, thin structure of the East Mole with ships berthed on both sides.
Caption: “The Wooden Lifeline: The East Mole, never designed for docking, facilitated the rescue of nearly 240,000 troops.”
4. The “Little Ships”: Myth vs. Reality
The narrative of the “Little Ships” suggests a spontaneous civilian armada saved the army. While 700 civilian vessels participated, the heavy lifting was done by the Royal Navy.
4.1. The Small Vessels Pool
The British Ministry of Shipping requisitioned over 700 private vessels: motor yachts, lifeboats, Thames barges, and fishing trawlers. These were not commanded by their owners (mostly) but by naval ratings.
-
The Tactical Function: These shallow-draft vessels were critical not for the cross-channel trip, but as tenders. Large ships could not get close to the beaches. The “Little Ships” formed a continuous ferry service, shuttling men from the waterline to the destroyers standing offshore.
-
Attrition: The cost was high. Many small boats were swamped by the panic of soldiers trying to board, or destroyed by the wash of fast-moving destroyers.
4.2. The Destroyer Burden
Of the 338,000 men saved, the vast majority were carried by 39 Royal Navy destroyers, minesweepers, and ferries.
-
Losses: The Royal Navy paid a butcher’s bill. 6 British destroyers were sunk (e.g., HMS Grenade, HMS Grafton) and 19 were damaged. The French Navy lost 3 destroyers (Bourrasque, Siroco, L’Adroit). The loss of these escorts was so severe that the Admiralty temporarily withdrew the newest destroyers on May 29, fearing the Home Fleet would be left defenseless against a German invasion.
IMAGE SUGGESTION 4
Subject: Little Ships acting as Tenders
Description: A photo showing small boats ferrying soldiers to a larger ship anchored offshore.
Caption: “The Last Mile: The primary role of the Little Ships was ferrying troops from the shallow beaches to the deep-water destroyers.”
5. The Air War: The Statistical Reality
A persistent myth among the soldiers on the beaches was “Where is the RAF?” In reality, the Royal Air Force fought a desperate, high-altitude battle of attrition that prevented the Luftwaffe from annihilating the pocket.
5.1. The Interception Doctrine
Air Vice-Marshal Keith Park (11 Group) ordered patrols to intercept German bomber formations inland, before they reached the beaches.
-
Visibility: Because the combat took place at 20,000 feet and often miles inland, the troops on the beaches saw only the German bombers that leaked through the screen, leading to the perception of abandonment.
-
Sortie Rates: The RAF flew 4,822 sorties in nine days. They lost 106 aircraft, while the Luftwaffe lost roughly 156.
5.2. The Physics of the Beach
The Luftwaffe faced technical difficulties.
-
Soft Sand: The soft sand of the Dunkirk dunes absorbed the impact of German bombs, significantly reducing the blast radius and fragmentation effect.
-
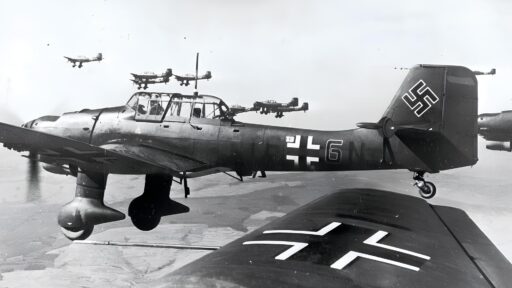
Target Obscuration: The burning oil refineries at Dunkirk created a massive pall of black smoke that drifted over the harbor and beaches, obscuring targets for the Stuka dive-bombers.
-
Defiant Failure: Dunkirk saw the first major deployment of the Boulton Paul Defiant, a turret-fighter with no forward guns. After initial success, they were decimated by Bf 109s, proving the concept of a turret-fighter obsolete.
IMAGE SUGGESTION 5
Subject: Air Combat Over Dunkirk
Description: An illustration or photo of a Spitfire engaging a German bomber (He 111 or Ju 87) over the Channel.
Caption: “The Invisible Umbrella: The RAF fought the Luftwaffe inland, preventing the total annihilation of the troops on the beaches.”
6. The French Rear Guard: The Siege of Lille
The evacuation would have been impossible without the sacrificial defense of the French First Army, which shielded the withdrawal corridor.
6.1. The Pocket of Lille (May 28–31)
While the BEF retreated, General Jean-Baptiste Molinié and 40,000 French troops were surrounded at Lille.
-
The Resistance: They held off seven German divisions (including three Panzer divisions) for four critical days. They fought house-to-house until they ran out of ammunition.
-
German Recognition: The German commander, General Waeger, was so impressed by the French defense that he granted them full military honors during their surrender—a rare event in WWII.
-
Strategic Impact: It is estimated that the French defense at Lille tied down the German forces that otherwise would have cut the retreat route to Dunkirk, saving at least 100,000 British soldiers.
6.2. The Perimeter Defense
The final defense of the Dunkirk perimeter itself was manned largely by French troops of the 12th Motorized Infantry Division and the British Coldstream Guards. They held the canal line under intense artillery fire until the final British ship departed. On June 4, after the last ship left, 40,000 French troops who remained on the beaches were forced to surrender.
IMAGE SUGGESTION 6
Subject: French Troops Defending Lille
Description: A photo of French soldiers manning a barricade or operating a 75mm field gun in an urban setting.
Caption: “Buying Time with Blood: The French First Army’s defense of Lille tied down seven German divisions, allowing the BEF to escape.”
7. The Equipment Disaster: Strategic Disarmament
Operation Dynamo saved the personnel of the British Army, but tactically, it resulted in its total disarmament. The BEF ceased to exist as a fighting force.
7.1. The Inventory of Loss
The equipment abandoned on the beaches and roads leading to Dunkirk represented the entirety of Britain’s modern arsenal:
-
2,472 artillery pieces (88% of field artillery).
-
63,879 vehicles (trucks, tank transporters).
-
20,548 motorcycles.
-
445 tanks (all heavy armor, including the Matildas).
-
76,000 tons of ammunition and 416,000 tons of stores.
7.2. The Vulnerability of Britain
In June 1940, the British Army in England had only enough equipment to fully arm two divisions. The rest of the troops were armed with WWI surplus rifles or improvised weapons (pikes and Molotov cocktails). The loss of the anti-tank guns was particularly critical, as Britain had almost no defense against a potential Panzer landing (Operation Sea Lion). This deficit forced Britain into total dependency on US Lend-Lease aid.
IMAGE SUGGESTION 7
Subject: Abandoned Vehicles on Dunkirk Beach
Description: A poignant photo of lines of British trucks, artillery, and equipment driven into the sea or abandoned on the dunes.
Caption: “A Disarmed Nation: The BEF returned to England virtually naked, leaving a mountain of equipment for the Wehrmacht.”
8. Political Fallout: The “Bras-de-Fer” Policy
The evacuation strained the Anglo-French alliance to the breaking point.
8.1. The Crisis of Priority
Initially, the Royal Navy was ordered to prioritize British troops. This caused outrage in Paris. On May 30, Churchill flew to Paris and, realizing the collapse of the alliance was imminent, ordered Admiral Ramsay to enforce a policy of “Bras-de-fer” (arm-in-arm), evacuating British and French troops in equal numbers.
-
The Result: 123,000 French soldiers were evacuated. However, most were immediately transported back to other French ports (Brest, Cherbourg) to continue the fight. Tragically, the majority of these men were captured just weeks later when France surrendered on June 22.
8.2. Churchill’s Political Consolidation
Domestically, the “success” of Dunkirk allowed Winston Churchill to consolidate his position against the “Peace Party” in his cabinet (Lord Halifax). By framing the evacuation as a demonstration of resolve rather than a defeat, he mobilized public opinion for the “Long War.”
IMAGE SUGGESTION 8
Subject: Churchill and Reynaud
Description: A photo of Churchill meeting with French Prime Minister Reynaud, looking grave.
Caption: “The Politics of Retreat: Churchill enforced the ‘Bras-de-fer’ policy to evacuate French troops, attempting to salvage the crumbling alliance.”
9. Conclusion: The Center of Gravity Preserved
Operation Dynamo was a logistical miracle that defied military probability. The Wehrmacht, usually a master of encirclement, failed to close the pocket due to a combination of political interference (the Halt Order), hubris (Göring), and rigid logistics.
Strategically, the evacuation preserved the Center of Gravity of the British war effort: the professional core of the British Army. While they lacked weapons, these 338,000 men provided the cadre of officers and NCOs who would train the conscript armies of 1941-1944. Without the “Old Contemptibles” saved at Dunkirk, the British Army would have ceased to exist as a functional institution, likely forcing Britain out of the war.
IMAGE SUGGESTION 9
Subject: Soldiers Arriving at Dover
Description: A photo of exhausted but relieved British soldiers arriving at a railway station in England, being handed tea by civilians.
Caption: “The Nucleus of Victory: The survivors of Dunkirk formed the backbone of the future army that would land in Normandy four years later.”
IMAGE SUGGESTION 10
Subject: German Troops Inspecting Abandoned Equipment
Description: German soldiers looking at the massive piles of British equipment left on the beach.
Caption: “The Spoils of War: The Wehrmacht captured enough material to equip several divisions, but failed to capture the army itself.”
References and Further Reading
-
Official History: Ellis, L.F. The War in France and Flanders 1939–1940. HMSO. (The foundational British military text).
-
Operational Analysis: Lord, Walter. The Miracle of Dunkirk. Penguin Books. (The classic narrative account).
-
Naval Logistics: Gardner, W.J.R. The Evacuation from Dunkirk: Operation Dynamo, 26 May-4 June 1940. Routledge. (Detailed naval staff analysis).
-
German Perspective: Frieser, Karl-Heinz. The Blitzkrieg Legend: The 1940 Campaign in the West. Naval Institute Press. (Crucial for understanding the Halt Order).
-
Air War: Franks, Norman. Air Battle Dunkirk: 26 May – 3 June 1940. Grub Street. (Statistical breakdown of the air campaign).
-
Political History: Roberts, Andrew. Churchill: Walking with Destiny. Penguin. (Covers the Cabinet crisis).
-
The French Role: Montefiore, Hugh Sebag. Dunkirk: Fight to the Last Man. Penguin. (Focuses on the Siege of Lille and French defense).
-
Technical Data: The Association of Dunkirk Little Ships. History of the Little Ships. (Technical registry of the civilian vessels).
-
Primary Documents: The National Archives (UK). Operation Dynamo: The Evacuation from Dunkirk. (Original Admiralty logs).
-
Strategic Analysis: Weinberg, Gerhard. A World at Arms: A Global History of World War II. Cambridge University Press.
-
Halt Order Analysis: US Army Center of Military History. The German Campaign in the West 1940.
-
Museum Resource: Imperial War Museums. What Was Operation Dynamo?.
-
Article: BBC History. Dunkirk: The Soldiers’ Story.
-
Naval Biography: Oxford DNB. Ramsay, Sir Bertram Home.
-
Unit History: Atkin, Ronald. Pillar of Fire: Dunkirk 1940.