The Hinge of Fate: El Alamein and the Strategic Turning Point (1942)
Executive Summary
The Second Battle of El Alamein (October 23 – November 11, 1942) stands alongside Stalingrad and Midway as one of the decisive pivots of World War II. Winston Churchill famously remarked, “Before Alamein we never had a victory. After Alamein we never had a defeat.”
However, the battle’s significance lies deeper than morale. It marked the end of the Axis operational method in Africa—reliance on tactical improvisation and speed—and the ascendancy of the Allied method: Industrialized Attrition. General Bernard Montgomery deliberately rejected the mobile tactics of the past, forcing Rommel into a static “materialschlacht” (battle of material) that the Panzer Army Africa could not mathematically win. This article analyzes the geographic anomaly of the Alamein line, the deception masterpiece of Operation Bertram, and the logistical asymmetry that doomed the Afrika Korps.
1. The Geographic Anomaly: The Bottleneck
For two years, the desert war had been a pendulum, swinging back and forth across 1,000 miles of open desert where flanks were always open. At El Alamein, the geography changed the rules of the game.
1.1. The Qattara Depression
The Alamein position was unique because it possessed secure flanks.
-
The North: Bounded by the Mediterranean Sea.
-
The South: Bounded by the Qattara Depression, a vast salt sink 133 meters below sea level, surrounded by impassable cliffs and filled with quicksand-like sabkha.
-
The Funnel: Between the sea and the depression lay a 40-mile (64 km) wide “throat” of hard desert. Rommel could not flank this line; he had to punch through it. This geography neutralized Rommel’s greatest asset—maneuver—and favored the British asset—firepower.
1.2. The Defensive Belts (“Devil’s Gardens”)
Realizing he was trapped in a static defense, Rommel ordered the construction of massive minefields, known as the Teufelsgärten (Devil’s Gardens).
-
Density: Over 500,000 mines (mostly captured British/Egyptian stock) were laid in deep belts.
-
Design: These were not just barriers but “kill zones.” They were laced with ‘S-mines’ (anti-personnel) and interlocked with anti-tank guns. The plan was to force British armor to stall in the minefields, where they could be picked off by 88mm guns.
IMAGE SUGGESTION 1
Subject: Map of El Alamein Line
Description: A strategic map showing the 40-mile gap between the Mediterranean Sea and the Qattara Depression, highlighting the Axis minefields.
Caption: “The Geographical Straightjacket: The Qattara Depression denied Rommel his signature flanking maneuvers, forcing a head-on collision.”
2. Prelude: The Battle of Alam Halfa (August 1942)
Before the main battle, Rommel made one last desperate attempt to break through. This was the Battle of Alam Halfa (August 30 – September 5, 1942).
2.1. The Trap
Rommel tried to sweep south, hoping to lure the British tanks into a mobile battle.
-
Montgomery’s Refusal: Forewarned by Ultra intercepts, Montgomery ordered his tanks to dig in on the Alam Halfa ridge and refuse to move. He forced Rommel to attack dug-in Hull-Down tanks and anti-tank screens.
-
The Fuel Crisis: Rommel’s Panzers ran out of fuel during the maneuver (due to the sinking of the tanker San Andrea). Immobilized and pounded by the RAF, Rommel was forced to retreat. This defeat marked the psychological turning point; the “Rommel Myth” of invincibility was broken.
3. The New Master: Montgomery’s Doctrine
When Bernard Law Montgomery took command of the Eighth Army in August 1942, he instituted a “Cultural Revolution.”
3.1. “No Retreat”
Montgomery’s first act was to burn the contingency plans for a retreat to the Nile Delta. He declared, “We will stand and fight here. If we can’t stay here alive, then let us stay here dead.” This absolute clarity restored the morale of an army traumatized by the fall of Tobruk.
3.2. Centralized Artillery
British doctrine had previously dispersed artillery to support individual brigades. Montgomery re-centralized it.
-
The Barrage: He massed hundreds of guns to fire on a single narrow sector. This “creeping barrage” (a WWI tactic) was designed to pulverize the German minefields and infantry positions, paving a road for the armor.
3.3. Combined Arms Training
Montgomery pulled divisions out of the line to train them specifically for clearing minefields at night. Infantry, engineers (sappers), and tanks trained together to perfect the “drills” of breaching operations—something the Eighth Army had neglected.
IMAGE SUGGESTION 2
Subject: General Montgomery in Tank
Description: A photo of General Montgomery standing in the turret of a Grant or Sherman tank, wearing his signature black beret with two badges.
Caption: “The Professional: Montgomery brought a ruthless, mathematical approach to command, rejecting the amateurism of previous desert campaigns.”
4. Operational Deception: Operation Bertram
To break the stalemate, Montgomery needed surprise. Since he couldn’t hide his intention to attack, he had to hide the location and timing. This was Operation Bertram, directed by camouflage expert Jasper Maskelyne.
4.1. The Phantom Army
The goal was to make Rommel believe the attack would come in the South, while Montgomery planned to strike in the North.
-
Dummy Tanks: In the south, thousands of “Sunshields” (canvas covers) were placed over jeeps to make them look like tanks from the air.
-
Hidden Armor: In the north, real Sherman tanks were disguised as supply trucks using removable canopies (“Cannibals”).
-
The Fake Pipeline: A dummy water pipeline was constructed toward the southern front, advancing a few miles each night. The “construction” was timed to suggest readiness by November, tricking Rommel into thinking he had more time.
4.2. The Result
Rommel and his replacement, General Georg Stumme (Rommel was in Germany due to illness), deployed the 21st Panzer Division to the south to counter the fake threat. When the attack hit the north, the German armor was out of position and low on fuel.
IMAGE SUGGESTION 3
Subject: Operation Bertram Camouflage
Description: A photo showing a British tank disguised as a truck (‘Sunshield’), and dummy tanks made of plywood in the desert.
Caption: “The Art of Deception: Operation Bertram successfully tricked German intelligence, freezing Axis armor in the south while the hammer fell in the north.”
5. Material Asymmetry: The Industrial Tsunami
The battle was decided by the disparity in logistics and technology.
5.1. The M4 Sherman Arrival
The arrival of 300 American M4 Sherman tanks revolutionized the Eighth Army.
-
Firepower: The Sherman’s 75mm gun could fire a potent High Explosive (HE) shell. For the first time, British tanks could destroy German anti-tank guns and soft targets effectively.
-
Reliability: Unlike the Crusader (which broke down constantly), the Sherman was mechanically robust.
-
The Comparison: Rommel had roughly 500 tanks, but over half were obsolete Italian M13/40s. He had only about 30 Panzer IV “Specials” (long barrel) capable of matching the Sherman. Montgomery had over 1,000 tanks, including hundreds of Shermans and Grants.
5.2. Air Superiority
The Desert Air Force (DAF) had achieved total dominance.
-
Carpet Bombing: The RAF relentlessly bombed Axis airfields and supply convoys. The Luftwaffe in Africa was effectively grounded due to a lack of fuel. Rommel wrote, “Anyone who has to fight, even with the most modern weapons, against an enemy in complete command of the air, fights like a savage against modern European troops.”
IMAGE SUGGESTION 4
Subject: M4 Sherman Tank at El Alamein
Description: A photo of a Sherman tank advancing through the desert dust, crew visible in the hatch.
Caption: “The Game Changer: The M4 Sherman provided the Eighth Army with a dual-purpose gun capable of destroying both Panzers and anti-tank bunkers.”
Here is Part II of the comprehensive, technically detailed analysis of El Alamein and the Strategic Turning Point (1942).
This section covers the brutal execution of the battle: the “crumbling” operations, the decisive tank melee, the breaking of the Axis line, and the geopolitical consequences that sealed the fate of North Africa.
6. Operation Lightfoot: The Industrial Slog (October 23–26)
Montgomery’s plan, Operation Lightfoot, was contrary to the spirit of desert warfare. Instead of a sweeping flank maneuver, he ordered a frontal assault into the teeth of the enemy defenses.
6.1. The Artillery Barrage
At 21:40 on October 23, 1942, 882 field guns opened fire simultaneously.
-
Seismological Impact: The barrage was so intense that the muzzle flashes illuminated the horizon like daylight, and the tremors were felt in Alexandria, 60 miles away.
-
The Objective: The shelling was not just to kill, but to cut the communication wires between the Axis forward units and their HQs, paralyzing their command structure (German General Stumme died of a heart attack while trying to investigate the silence).
6.2. The Infantry and Sappers
The burden fell on the infantry (specifically the 9th Australian, 51st Highland, and 2nd New Zealand Divisions) and the Royal Engineers (Sappers).
-
The Minefields: Using mine detectors and bayonets, sappers had to clear two lanes (Oxalic and Pierson) through the “Devil’s Gardens” by hand, at night, under mortar fire.
-
The Traffic Jam: By dawn on October 24, the lanes were not fully clear. British tanks, trying to follow the infantry, bunched up in the minefields, becoming stationary targets for German anti-tank guns. The “Blitzkrieg” had turned into a traffic jam.
IMAGE SUGGESTION 5
Subject: British Infantry Advancing at Night
Description: An illustration or night-time photo showing British infantry advancing through the dust and smoke of the artillery barrage.
Caption: “The Crumbling: Operation Lightfoot required infantry to advance directly into minefields to clear a path for the armor.”
7. The Crisis and ‘Outpost Snipe’ (October 26–28)
By October 26, the British attack had stalled. Casualties were mounting, and the armor had failed to break out into the open desert (“The Skin”). Montgomery faced pressure to call off the attack.
7.1. The “Crumbling” Strategy
Instead of retreating, Montgomery doubled down. He ordered the 9th Australian Division to attack north toward the coast.
-
The Pivot: This attack threatened to cut off the German 164th Light Division. Rommel (who had rushed back from Germany) was forced to shift his elite units north to stop the Australians.
-
Attrition: This was the goal. Montgomery forced Rommel to burn his precious fuel moving tanks back and forth to plug gaps, grinding down the Panzer Army in a battle of attrition it could not sustain.
7.2. The Defense of Outpost Snipe
The turning point was a small, kidney-shaped depression known as Outpost Snipe.
-
The Stand: On the night of October 26, the 2nd Battalion, The Rifle Brigade, seized this position deep inside German lines.
-
The 6-Pounder: Armed with new 6-pounder anti-tank guns (57mm), the battalion held out for 14 hours against continuous counter-attacks by the 21st Panzer Division.
-
The Toll: At point-blank range, the Rifle Brigade destroyed over 50 Axis tanks and self-propelled guns. It was the graveyard of the Afrika Korps’ armor. Rommel wrote later, “The resistance of the enemy at Snipe was magnificent… and caused us heavy losses.”
IMAGE SUGGESTION 6
Subject: 6-Pounder Anti-Tank Gun at Snipe
Description: A photo or artwork depicting the crew of a 6-pounder gun engaging German tanks amidst the smoke at Outpost Snipe.
Caption: “The Graveyard of the Panzers: At Outpost Snipe, British 6-pounder guns destroyed the core of the 21st Panzer Division.”
8. Operation Supercharge: The Breakthrough (November 2)
By November, Rommel’s fuel was critical, and his tank strength had dropped to 35 serviceable runners against Montgomery’s 600. Montgomery launched the final blow: Operation Supercharge.
8.1. The Hammer Blow
Shifted slightly south of the Australian sector, the attack was spearheaded by the 2nd New Zealand Division (commanded by General Freyberg).
-
Tank-on-Tank: This led to the Battle of Tel el Aqqaqir, the largest tank-on-tank engagement of the campaign. The British 9th Armoured Brigade charged the German guns in a suicidal assault reminiscent of the Light Brigade.
-
The Breach: Though the brigade was destroyed (losing 70 of 94 tanks), they smashed the German gun line. Through the gap poured the 1st Armoured Division. The Axis line was broken.
8.2. Hitler’s “Victory or Death” Order
On November 2, realizing the battle was lost, Rommel ordered a retreat to save his remaining mechanized forces.
-
The Interference: Hitler intervened, sending a radio signal: “To Field Marshal Rommel… In your situation there can be no other thought but to stand fast, yield not a yard of ground and throw every gun and every man into the battle… As to your troops, you can show them no other road than that to victory or death.”
-
The Consequence: Rommel hesitated for 24 hours, obeying the order. This delay caused the destruction of the Italian Ariete Armored Division, which fought to the last tank to cover the German retreat. Finally, Rommel disobeyed and ordered the retreat, but the delay cost him his non-motorized infantry.
IMAGE SUGGESTION 7
Subject: Destroyed German Panzer IV
Description: A photo of a burning or destroyed Panzer IV Special in the desert after the breakthrough.
Caption: “The Broken Spine: By November 4, the Afrika Korps had virtually no operational tanks left to stop the British breakout.”
9. Strategic Consequences: The End of the Beginning
The victory at El Alamein was total. The Axis lost 30,000 prisoners (mostly Italian), 50,000 killed or wounded, and essentially all their heavy equipment.
9.1. The Torch Landings
Four days after the breakthrough (November 8), Anglo-American forces landed in Morocco and Algeria (Operation Torch).
-
The Vice: Rommel was now caught in a strategic vice. He retreated 1,500 miles west to Tunisia, pursued by the Eighth Army, while the Americans advanced from the west. The Axis forces were evicted from Africa entirely by May 1943.
9.2. Geopolitical Impact
-
Mediterranean Security: The victory secured the Suez Canal and the Middle Eastern oil fields for the duration of the war.
-
Second Front: It convinced the Americans that a cross-Channel invasion of France in 1943 was premature, redirecting Allied strategy to the “Soft Underbelly” (Sicily and Italy).
-
Psychology: For the British Empire, it was the redemption of the Army. The “Rommel Myth” was shattered, and the effectiveness of industrialized attrition warfare was proven.
IMAGE SUGGESTION 8
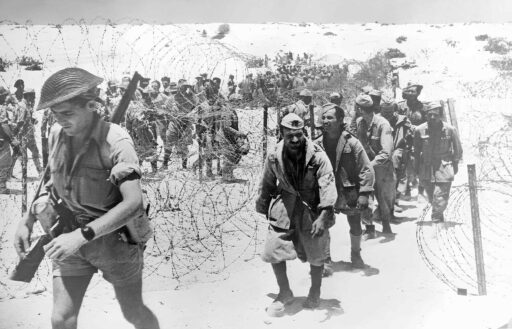
Subject: Italian PoWs Marching
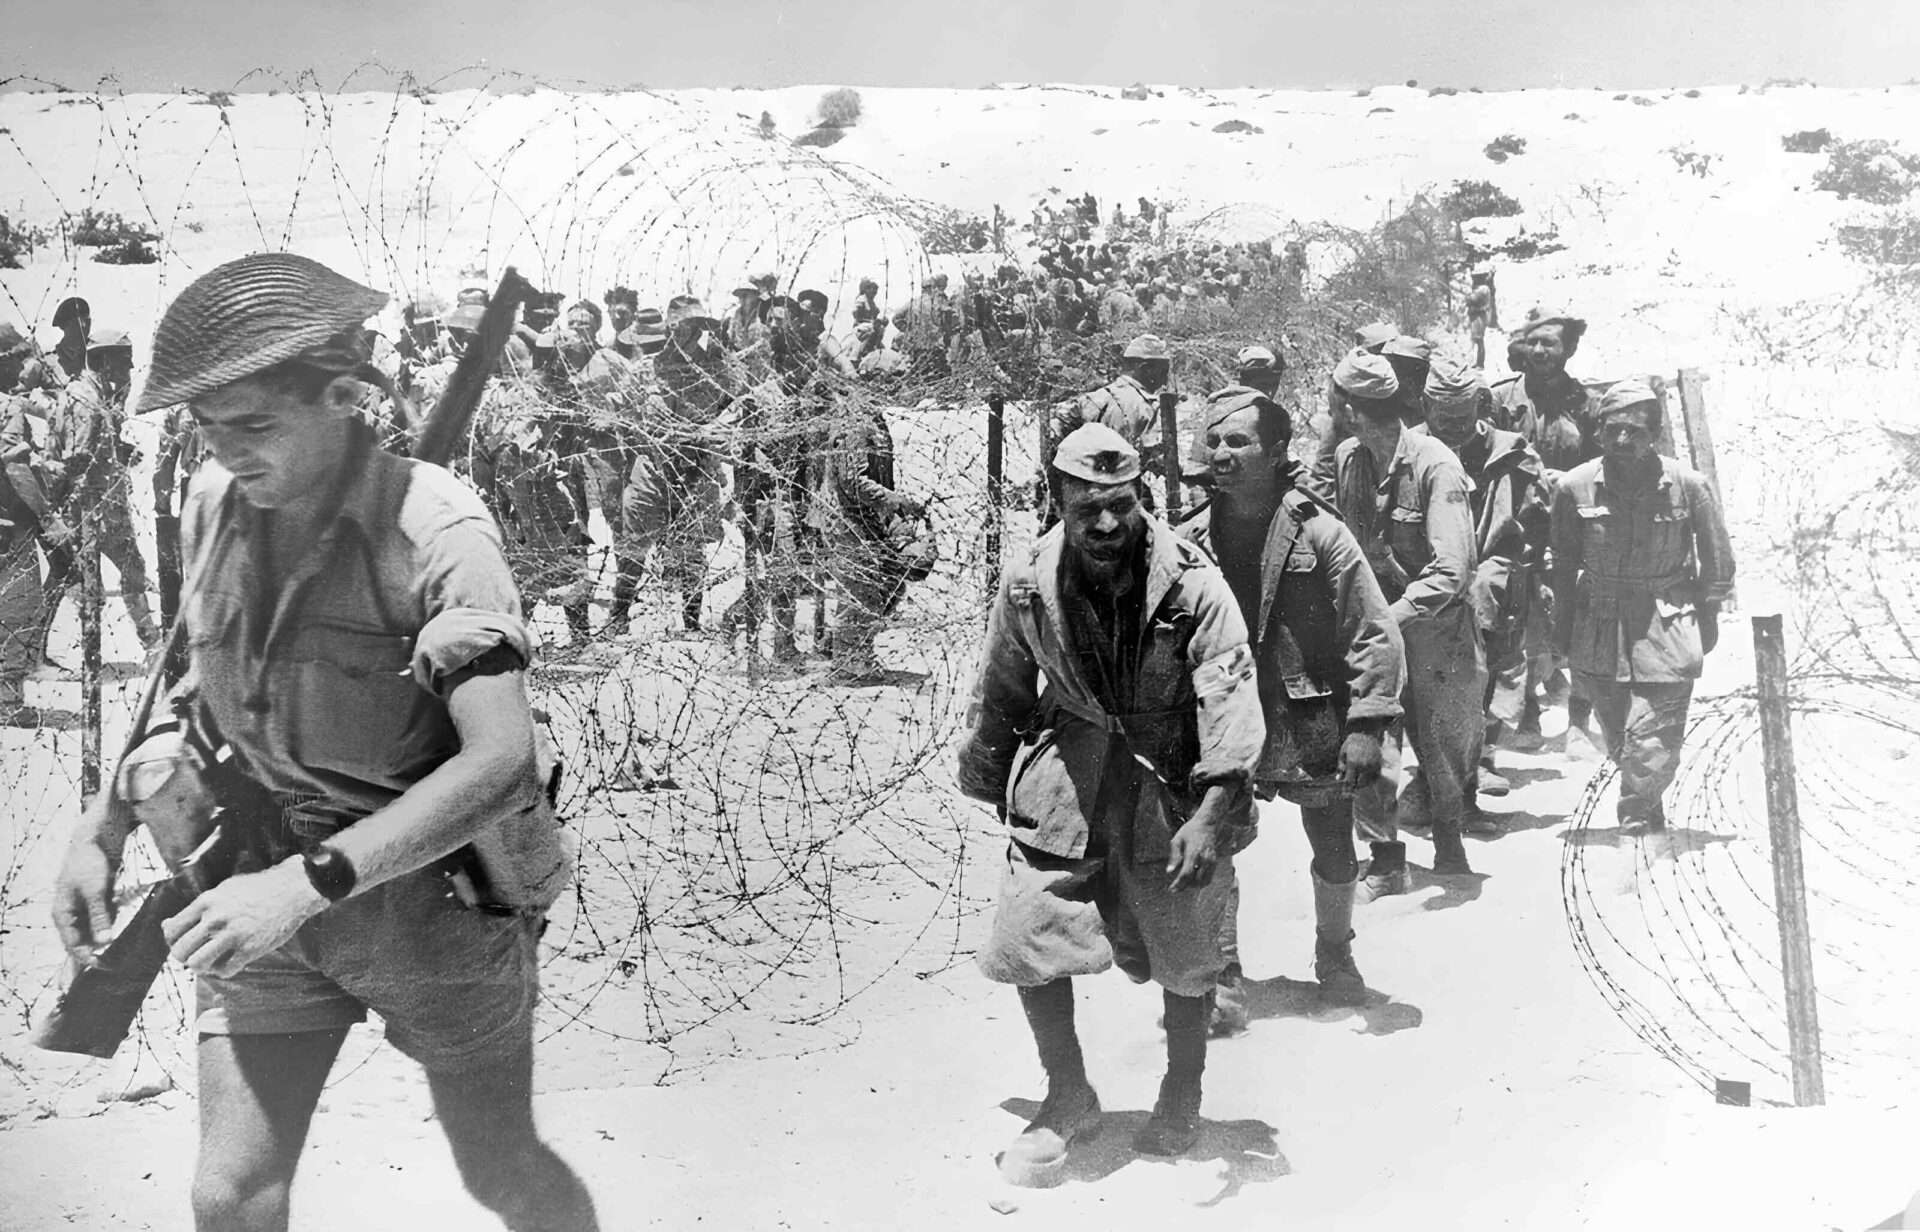
Description: A photo of thousands of Italian prisoners of war marching into captivity after the battle.
Caption: “The Human Cost: Over 30,000 Axis troops surrendered at Alamein, the majority being Italian infantry abandoned by the motorized German retreat.”
10. Conclusion: The Triumph of Logistics and Method
El Alamein was not a victory of maneuver; it was a victory of method.
Montgomery did not out-fox Rommel; he out-produced and out-managed him. He forced the “Desert Fox” into a battle of attrition—a meat grinder—where tactical genius was irrelevant compared to the weight of shells, fuel, and replacement tanks.
The battle demonstrated the shift in warfare from the romanticized cavalry charges of 1941 to the grim, mathematical destruction that would characterize the rest of the war. As Rommel looked at the ruins of his army, he realized that the age of the Blitzkrieg in Africa was over; the age of the Materialschlacht had begun.
IMAGE SUGGESTION 9
Subject: El Alamein Cemetery
Description: A photo of the Commonwealth War Graves Cemetery at El Alamein, with rows of headstones in the desert.
Caption: “The Legacy: The Alamein Memorial stands as a testament to the thousands who died turning the tide of the war in Africa.”
IMAGE SUGGESTION 10
Subject: Churchill Victory Sign
Description: A photo of Winston Churchill flashing the ‘V for Victory’ sign, perhaps visiting the troops in the desert.
Caption: “The End of the Beginning: Churchill marked Alamein as the point where the Allied survival phase ended and the victory phase began.”
References and Further Reading
-
Comprehensive Battle History: Barr, Niall. Pendulum of War: The Three Battles of El Alamein. Pimlico. (The definitive modern account).
-
Montgomery’s Role: Hamilton, Nigel. Monty: The Making of a General. McGraw-Hill.
-
Rommel’s Perspective: Rommel, Erwin. The Rommel Papers. Da Capo Press. (Primary source covering the battle and retreat).
-
Operation Bertram: Stroud, Rick. The Phantom Army of Alamein: How the Camouflage Unit and Jasper Maskelyne Fooled the Whole German Army. Bloomsbury.
-
Technical Analysis: Latimer, Jon. Alamein. Harvard University Press.
-
Artillery Tactics: Evans, Martin Marix. El Alamein: The Battle that Turned the Tide.
-
Outpost Snipe: Lucas Phillips, C.E. Alamein. Pan Books. (Detailed account of the Rifle Brigade’s stand).
-
The M4 Sherman: Zaloga, Steven. Armored Thunderbolt: The U.S. Army Sherman in World War II. Stackpole.
-
Air Power: Overy, Richard. The Air War 1939-1945. (Covers the DAF contribution).
-
The Minefields: Croll, Mike. The History of Landmines. Leo Cooper.
-
Unit History: Doherty, Richard. The Eighth Army at War 1939-1945. Pen & Sword.
-
Axis Retreat: Hinsley, F.H. British Intelligence in the Second World War. Cambridge. (Covers Ultra intercepts during the retreat).
-
Australian Contribution: AWM. El Alamein. Australian War Memorial.
-
Geopolitics: Weinberg, Gerhard. A World at Arms. Cambridge.
-
Primary Documents: The Alamein Despatches. Official British Army reports archived at the Imperial War Museum.