The Pendulum of Sand: Logistics, Armor, and the Struggle for North Africa (1940–1943)
Executive Summary
The North African Campaign (June 10, 1940 – May 13, 1943) stands as the purest example of mechanized warfare in World War II. Unlike the Eastern Front, which was a war of annihilation, or the Pacific, which was a war of islands, North Africa was a “Tactician’s Paradise and a Quartermaster’s Hell.”
Fought along a narrow coastal strip separating the impassable Qattara Depression from the Mediterranean Sea, the campaign was dictated by the physics of supply lines. It was a seesaw battle where the victor was often defeated by his own logistics; as an army advanced, its supply lines lengthened and weakened, while the retreating enemy fell back on their supply bases and strengthened.
This article analyzes the technical collapse of the Italian Tenth Army, the operational brilliance of Erwin Rommel and the Afrika Korps, the armored asymmetry between the British “Cruiser” tanks and German Panzers, and the pivotal role of the fortress of Tobruk in denying Axis logistics.
1. The Theater of Operations: The Physics of the Desert
To understand the tactics of North Africa, one must first understand its unique geography. The battlefield was effectively a ribbon of land, rarely more than 40 miles wide, stretching 1,200 miles from Tripoli (Libya) to Alexandria (Egypt).
1.1. The Via Balbia and the “Blue Water” Flank
-
The Artery: All logistics depended on a single paved road, the Via Balbia. Control of this road was the primary operational objective. Moving off-road (into the desert flank) caused extreme wear on tank tracks and engines due to the abrasive sand and rock.
-
The Ports: Strategic sustainability relied entirely on the possession of deep-water ports: Tripoli, Benghazi, Tobruk, and Alexandria.
-
The Logistical Tether: A truck convoy consumes fuel to transport fuel. German logistical studies indicated that once an army advanced 300 miles from its port, 50% of the fuel carried was consumed by the delivery trucks themselves. This created a “culminating point” that repeatedly saved the British from total defeat and stopped Rommel from reaching the Suez Canal.
1.2. The Terrain as an Ocean
Commanders viewed the desert much like an ocean.
-
Navigation: There were no landmarks. Units navigated by sun-compass and dead reckoning.
-
Flanks: The southern flank (the deep desert) was always “open,” allowing for wide outflanking maneuvers similar to naval warfare. However, the further south one went, the harsher the terrain (the “Great Sand Sea”), acting as a natural barrier similar to a coastline.
IMAGE SUGGESTION 1
Subject: Map of the North African Theater (1940-1943)
Description: A strategic map showing the long coastal strip, the key ports (Tripoli, Benghazi, Tobruk, Alexandria), the Via Balbia, and the Qattara Depression bottleneck.
Caption: “The Tyranny of Distance: The campaign was fought along a narrow coastal ribbon where logistical reach dictated the limit of advance.”
2. Operation Compass: The Italian Collapse (1940)
The war began with the declaration of war by Italy on June 10, 1940. Marshal Rodolfo Graziani invaded Egypt in September 1940 but halted at Sidi Barrani to build a series of fortified camps.
2.1. The Western Desert Force (WDF)
General Richard O’Connor, commanding the British WDF (only 36,000 men), launched a “five-day raid” named Operation Compass in December 1940. It turned into a full-scale rout.
-
The Matilda II: The key technical asset was the Matilda II infantry tank. Its 78mm of frontal armor made it impervious to every Italian anti-tank and tank gun. The Italians called it the “Queen of the Desert.”
-
The Gap: O’Connor exploited the gap between the Italian fortified camps (Nibeiwa and Tummar), attacking them from the rear. The Italian forces, lacking radios and relying on static defense, were sliced apart.
2.2. The Battle of Beda Fomm (February 1941)
In a stroke of operational brilliance, O’Connor sent his mobile force (Combe Force) across the unmapped interior of the Cyrenaica bulge to cut off the retreating Italian army.
-
The Interception: On February 5, British light tanks reached the coast at Beda Fomm just hours before the retreating Italians.
-
The Result: 36,000 British troops captured 130,000 Italian prisoners, 400 tanks, and 1,291 guns. The Italian Tenth Army ceased to exist. British forces reached El Agheila, poised to take Tripoli, but were ordered to halt to send troops to defend Greece—a strategic error that allowed the Axis to recover.
IMAGE SUGGESTION 2
Subject: Italian Prisoners of War at Compass
Description: A photo of a massive column of thousands of Italian POWs marching across the desert, guarded by a single British vehicle.
Caption: “The Collapse of the Tenth Army: Operation Compass resulted in the capture of 130,000 Italian troops, exposing the obsolescence of Italian equipment.”
3. Enter the Fox: Operation Sonnenblume (1941)
Hitler could not allow his Italian ally to collapse. On February 6, 1941, he dispatched the Deutsches Afrikakorps (DAK) under Generalleutnant Erwin Rommel.
3.1. The Auftragstaktik Shock
Rommel was ordered to hold a defensive line at Sirte. Instead, adhering to the German doctrine of Auftragstaktik (Mission Command), he launched an immediate offensive on March 24, 1941.
-
Speed vs. Weight: The British forces, depleted by the Greek expedition and equipped with worn-out vehicles, collapsed. Rommel reconquered Cyrenaica in two weeks, destroying the British 2nd Armored Division.
-
General Capture: In the chaos, the British commanders O’Connor and Neame were captured by a German patrol, decapitating the British leadership.
3.2. The Technical Edge: The 88mm Flak
Rommel introduced a weapon that changed the nature of armored warfare: the 88mm Flak 36.
-
The Innovation: Originally an anti-aircraft gun, Rommel used it in a direct-fire anti-tank role. Its high muzzle velocity (820 m/s) allowed it to penetrate the thick armor of the Matilda II at ranges of 2,000 meters—far beyond the range of any British tank gun.
-
The Trap: Rommel developed the tactic of using light tanks as bait to lure British armor onto a “screen” of dug-in 88mm guns. This “Flak Front” decimated British armored charges.
IMAGE SUGGESTION 3
Subject: 88mm Flak Gun in Desert Role
Description: A photo of a German 88mm gun deployed horizontally on the desert floor, crew engaging British tanks.
Caption: “The Tank Killer: Rommel’s use of the 88mm anti-aircraft gun in a ground role negated the British armor advantage.”
4. Technical Analysis: The Armor Asymmetry
The campaign was defined by the disparity in tank design and doctrine between the belligerents.
4.1. British Doctrine: The Fatal Split
British doctrine divided tanks into two classes, which proved disastrous:
-
Cruiser Tanks (e.g., Crusader): Fast but thinly armored and mechanically unreliable. Designed to fight other tanks.
-
Infantry Tanks (e.g., Matilda, Valentine): Heavily armored but slow. Designed to support infantry.
-
The Flaw: This separation meant British armored divisions lacked the heavy armor to break through, while infantry divisions lacked the speed to exploit breakthroughs. Furthermore, British tanks were armed with the 2-pounder gun, which lacked a High Explosive (HE) shell. This meant British tanks could not effectively engage German anti-tank guns (Pak 38/40).
4.2. German Doctrine: The Panzer III and IV
The Germans used “Main Battle Tanks” before the term existed.
-
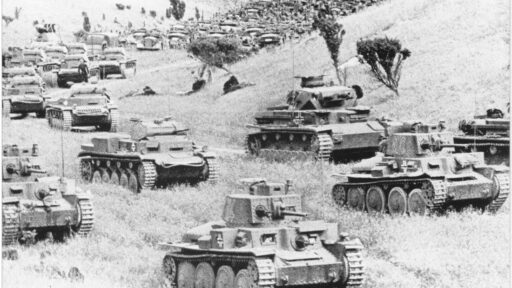
Panzer III (Ausf J): The primary anti-tank vehicle, later upgraded with a long 50mm gun.
-
Panzer IV (Ausf F2): Provided HE support and later (with the long 75mm gun) became the supreme killer of the desert.
-
Reliability: German optics (Zeiss) were superior, and their radios allowed for complex tactical coordination, whereas many British tank crews still relied on flag signals in 1941.
IMAGE SUGGESTION 4
Subject: Crusader vs Panzer III Comparison
Description: A technical comparison image showing the profile, armor thickness, and gun caliber of a British Crusader vs. a German Panzer III.
Caption: ” doctrinal Divergence: The British split between ‘Cruiser’ and ‘Infantry’ tanks created a tactical inflexibility that the German Panzers exploited.”
5. The Siege of Tobruk: The Thorn in the Side (1941)
As Rommel swept east toward Egypt, one fortress held out: the port of Tobruk. Its garrison consisted of the 9th Australian Division under General Leslie Morshead.
5.1. The Strategic Necessity
Rommel could not advance on Alexandria while leaving Tobruk in his rear.
-
The Port: Tobruk was the only deep-water port between Benghazi and Alexandria. Without it, Rommel’s supply lines stretched 1,000 miles to Tripoli.
-
The Threat: A British force in Tobruk could sortie out and cut the Via Balbia, severing the Afrika Korps’ lifeline.
5.2. The “Easter Battle” (April 1941)
Rommel launched a hasty assault on Tobruk, violating his own doctrine of preparation.
-
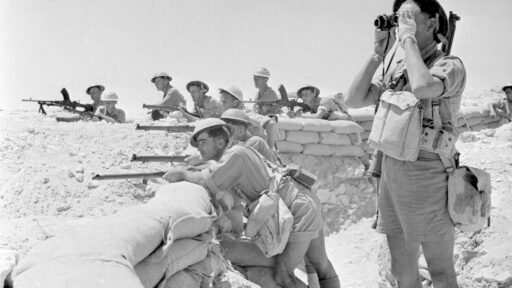
Defense in Depth: The Australians utilized the pre-existing Italian concrete perimeter but innovated with “aggressive defense.” They allowed German Panzers to pass over their foxholes, then popped up to engage the German infantry following behind, separating the tanks from their support.
-
The Result: The German assault failed with heavy losses (the first German defeat of the war). Tobruk settled into a siege that would last 240 days. The “Rats of Tobruk” (a name given by Lord Haw-Haw and worn as a badge of honor) denied Rommel the logistics needed to conquer Egypt in 1941.
IMAGE SUGGESTION 5
Subject: Australian Troops at Tobruk
Description: A photo of Australian soldiers (‘Diggers’) manning a captured Italian post or a Bren gun pit in Tobruk.
Caption: “The Rats of Tobruk: The 9th Australian Division used aggressive defense to hold the port for 240 days, strangling Rommel’s supply lines.”
6. Operation Crusader: The Relief (Winter 1941)
British Commander-in-Chief Claude Auchinleck launched Operation Crusader in November 1941 to relieve Tobruk.
6.1. The Battle of Sidi Rezegh
This was a confused, swirling armored melee in the open desert.
-
The Totensonntag: On “Sunday of the Dead” (Nov 23), Rommel concentrated his armor and annihilated the South African 5th Brigade.
-
The “Dash to the Wire”: Believing the British were defeated, Rommel ignored his logistics and dashed for the Egyptian border (the Wire) to cut British supply lines. It was a strategic gamble.
-
Auchinleck’s Nerve: Unlike his predecessors, Auchinleck did not panic. He realized Rommel was overextended. He ordered the British Eighth Army to continue the attack on Tobruk. Rommel, running out of fuel and facing the threat to his rear, was forced to retreat all the way back to El Agheila.
6.2. Strategic Reset
By January 1942, the situation had reset to the starting positions of 1941. The British held Cyrenaica, but their supply lines were now overextended, and the Afrika Korps was receiving new tanks (Panzer III Specials) and supplies in Tripoli. The pendulum was about to swing back.
IMAGE SUGGESTION 6
Subject: Battle of Sidi Rezegh
Description: A chaotic scene of burning tanks (both British Crusaders and German Panzers) and smoke on the desert horizon.
Caption: “The Melee: Operation Crusader resulted in a confused armored brawl at Sidi Rezegh, eventually forcing Rommel to retreat due to fuel shortages.”
7. The Battle of Gazala: Rommel’s Masterpiece (May–June 1942)
By May 1942, both sides had rebuilt their strength. The British Eighth Army, now under General Neil Ritchie, established the Gazala Line, a series of fortified “boxes” protected by deep minefields stretching from the coast to the deep desert at Bir Hakeim.
7.1. The “Cauldron” Maneuver
On May 26, Rommel launched Operation Venice. He feinted a frontal attack but led his armored divisions on a wide sweep around the southern flank of the British line (the “Gazala Gallop”).
-
The Crisis: Rommel ran into unexpected trouble. The new American-supplied M3 Grant tanks, with their hull-mounted 75mm guns, outranged the German Panzers. Low on fuel and trapped against the British minefields with his back to the enemy, Rommel was on the verge of annihilation.
-
The Solution: Instead of retreating, Rommel consolidated his forces into a defensive posture behind the British minefields, a position known as “The Cauldron.” He used his 88mm anti-tank guns to smash the uncoordinated British armored counter-attacks sent piecemeal against him.
-
The Breakout: Once the British armor was blunted, Rommel punched through the British minefields to the west to open a supply line, then turned east to destroy the Eighth Army.
7.2. The Stand at Bir Hakeim
The southern anchor of the line was held by the 1st Free French Brigade under General Pierre Kœnig.
-
Resistance: Surrounded and bombarded by the Luftwaffe, the French held out for 16 days against the Afrika Korps. Their resistance bought the Eighth Army critical time to retreat, preventing a total encirclement, though the defeat was catastrophic.
IMAGE SUGGESTION 7
Subject: M3 Grant Tank
Description: A photo of the M3 Grant tank, distinct for its side-sponson mounted 75mm gun and high silhouette.
Caption: “The Interim Savior: The M3 Grant gave the British their first tank gun capable of firing High Explosive shells, challenging Rommel at Gazala.”
8. The Fall of Tobruk and the Rush to El Alamein (June–July 1942)
Following Gazala, the “Gazala Gallop” turned into a rout. The Eighth Army retreated toward Egypt.
8.1. The Shock of June 21
Unlike in 1941, the fortress of Tobruk fell in a single day (June 21, 1942).
-
Degradation: The defenses had been allowed to deteriorate. The mines had been stripped to build the Gazala Line.
-
The Assault: Rommel attacked the southeast perimeter with a massive Stuka bombardment and Panzer assault. 33,000 Allied troops surrendered.
-
Strategic Impact: The capture of Tobruk gave Rommel immense stores of British fuel and supplies, allowing him to ignore his own logistics and drive deep into Egypt, threatening the Suez Canal.
8.2. First Battle of El Alamein (July 1942)
General Claude Auchinleck took personal command of the Eighth Army. He chose to stand at El Alamein.
-
The Geography: This was the only position in the desert with “secure flanks.” The line stretched 40 miles from the Mediterranean Sea in the north to the impassable Qattara Depression in the south. Rommel could not flank it. He had to attack frontally.
-
The Halt: Exhausted and at the end of their supply tether, the Afrika Korps’ attacks failed. The “Panic” in Cairo subsided. The line held.
IMAGE SUGGESTION 8
Subject: Rommel Entering Tobruk
Description: A photo of Rommel in his command car inspecting the captured port of Tobruk, surrounded by British POWs.
Caption: “The Prize: The capture of Tobruk provided the fuel Rommel needed to advance to El Alamein, but it was his last major victory.”
9. The Turning Point: Second Battle of El Alamein (October 1942)
In August 1942, Prime Minister Churchill replaced Auchinleck with General Bernard Montgomery. Montgomery transformed the Eighth Army’s doctrine and morale.
9.1. Material Superiority and the Sherman
By October, the logistical balance had shifted decisively.
-
The M4 Sherman: The US delivered 300 M4 Sherman tanks. With a turret-mounted 75mm gun and reliable engines, the Sherman was superior to the Panzer III and equal to the Panzer IV.
-
The Numbers: Montgomery had 195,000 men and 1,000 tanks against Rommel’s 100,000 men (many sick) and 500 tanks (mostly obsolete Italian models).
9.2. Operation Lightfoot (October 23)
Montgomery rejected mobile warfare. He planned a WWI-style “battle of attrition” (Crumbling).
-
The Devil’s Gardens: Rommel had laid 500,000 mines in deep belts. Montgomery launched a massive artillery barrage (1,000 guns) to cover engineers clearing paths.
-
The Dogfight: For 10 days, British armor engaged German Panzers in a static slugging match. Montgomery could afford to lose three tanks for every one German tank; Rommel could not.
9.3. Operation Supercharge (November 2)
With the Axis fuel reserves critical (due to Royal Navy interdiction of tankers from Italy), Montgomery launched the breakout.
-
The Breakthrough: Rommel signaled Hitler that defeat was imminent. Hitler issued a “Victory or Death” order, which Rommel eventually disobeyed to save the remnants of his army. The Axis forces began a 1,500-mile retreat to Tunisia.
IMAGE SUGGESTION 9
Subject: El Alamein Artillery Barrage
Description: A night photo showing the muzzle flashes of the British 25-pounder artillery line opening the battle.
Caption: “Steel Rain: Montgomery utilized massive artillery superiority to grind down the Axis defenses in the Devil’s Gardens.”
10. Operation Torch: The Anvil (November 1942)
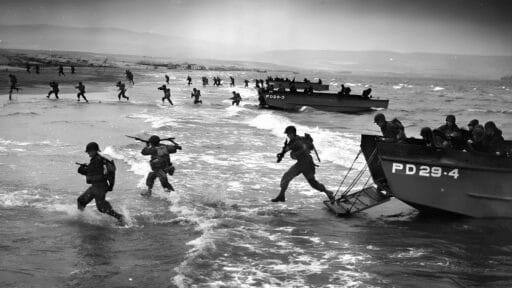
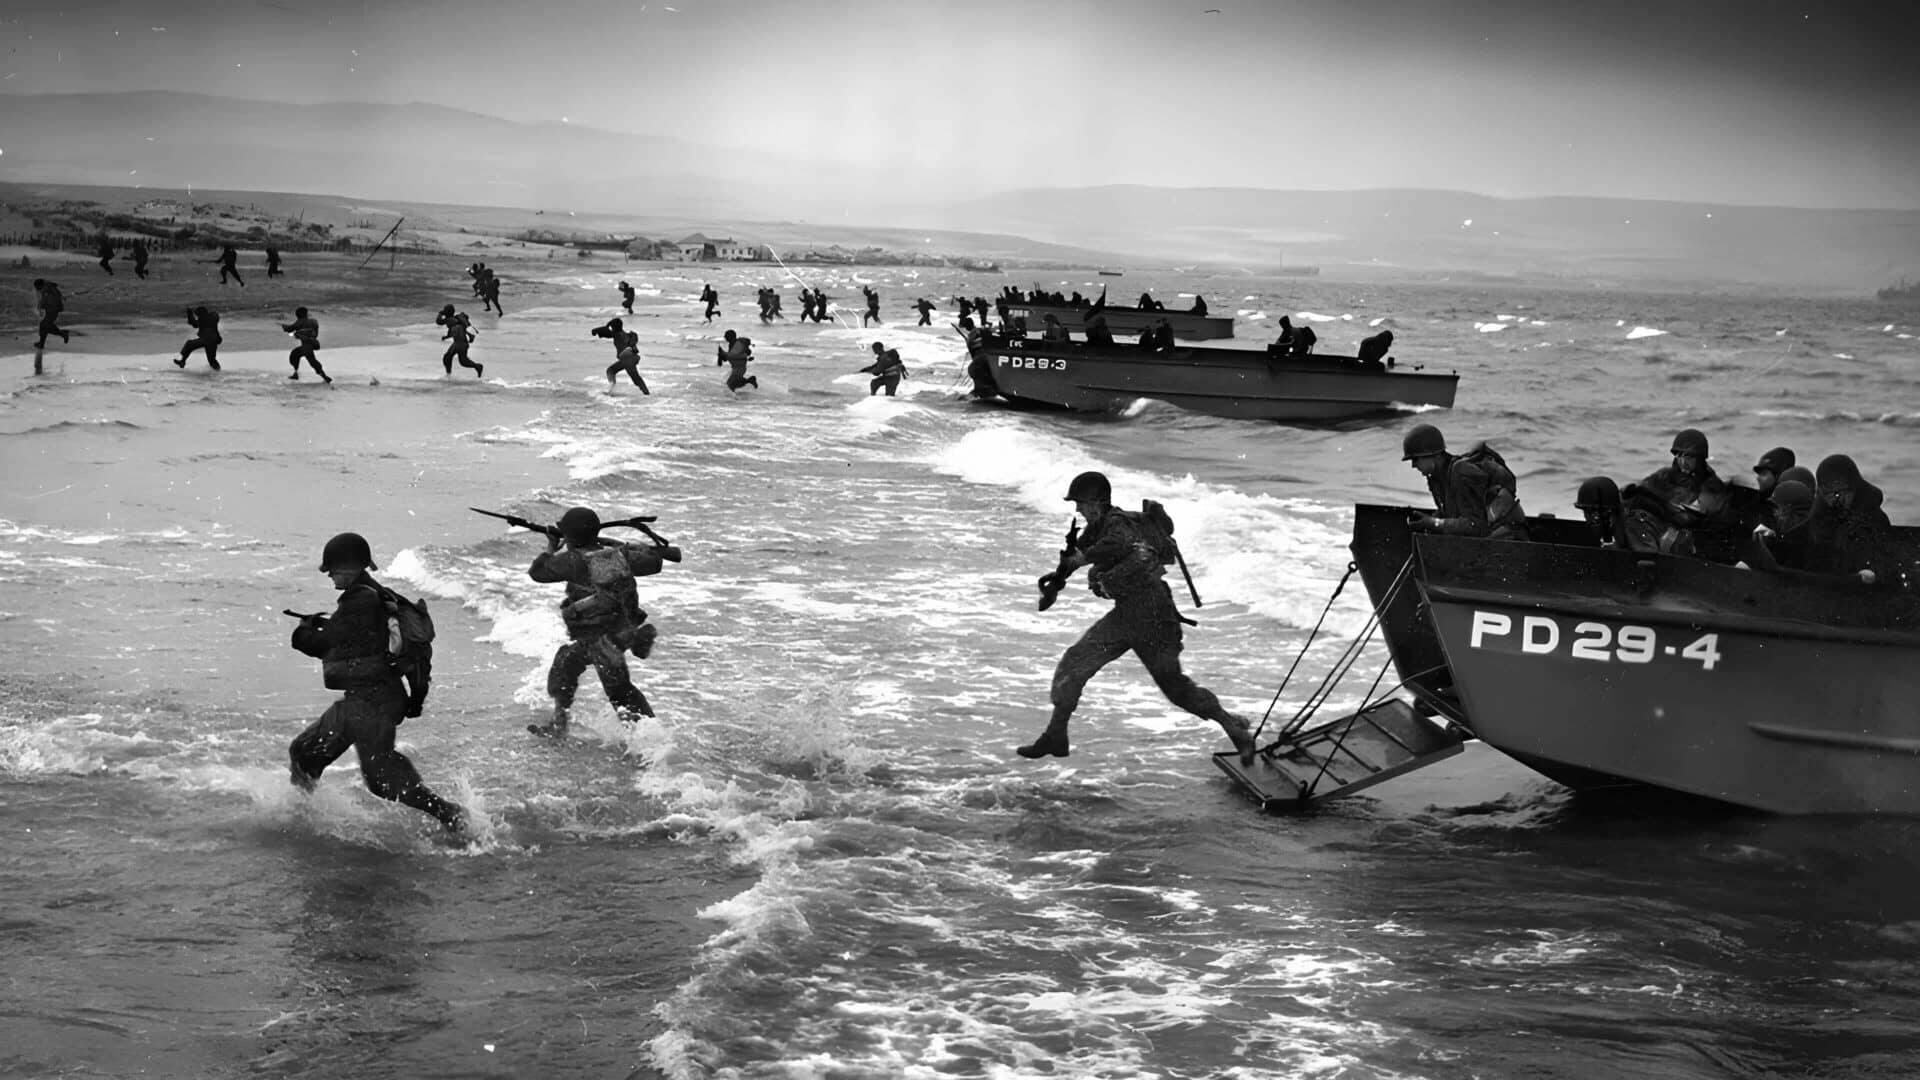
While Rommel retreated west, the Allies opened a second front in his rear. On November 8, 1942, Anglo-American forces landed in Morocco and Algeria.
10.1. The Political Maze
Commanded by General Dwight D. Eisenhower, the landings targeted Vichy French colonies.
-
Vichy Resistance: The reception was uncertain. At Oran and Casablanca, French forces fought back fiercely against the Americans.
-
The Darlan Deal: To stop the fighting, the Allies cut a controversial deal with Admiral François Darlan, a Vichy leader. This secured the French cease-fire but angered the Free French.
10.2. The Race for Tunis
The goal was to seize the ports of Tunis and Bizerte before the Germans could reinforce them.
-
The German Reaction: Hitler responded with surprising speed, airlifting troops (the 5th Panzer Army under Hans-Jürgen von Arnim) into Tunisia. The Allied advance was halted by winter rains and stiff German defense in the Tunisian mountains.
IMAGE SUGGESTION 10
Subject: US Troops Landing in North Africa
Description: A photo of American soldiers wading ashore from landing craft during Operation Torch, carrying the US flag.
Caption: “The Giant Enters: Operation Torch marked the first major American ground offensive in the European theater.”
11. The Tunisian Endgame: The Kasserine Shock (1943)
By early 1943, the Axis forces were trapped in a pocket in Tunisia, crushed between the Eighth Army advancing from Libya and the US/British First Army from Algeria.
11.1. Battle of Kasserine Pass (February 1943)
Rommel, sensing the inexperience of the US forces, launched a spoiling attack.
-
Tactical Failure: The US II Corps, positioned poorly and commanded ineffectively, collapsed. Rommel’s Panzers overran American artillery and caused a panic.
-
The Lesson: Kasserine was a wake-up call. Eisenhower fired the corps commander and brought in General George S. Patton to instill discipline. The US Army rapidly adapted its doctrine and air-ground coordination.
11.2. The Mareth Line and Surrender
Montgomery assaulted the old French fortifications of the Mareth Line in the south, while the First Army squeezed from the west.
-
Operation Vulcan: Using overwhelming air and naval superiority, the Allies strangled the Axis pocket.
-
The End: Rommel was recalled to Germany in March. On May 13, 1943, the remaining Axis forces surrendered. Over 275,000 German and Italian troops were taken prisoner—a defeat numerically larger than Stalingrad.
IMAGE SUGGESTION 11
Subject: German Surrender in Tunisia
Description: A photo of vast columns of German and Italian prisoners waiting in holding areas in Tunisia, May 1943.
Caption: “Tunisgrad: The surrender of 275,000 Axis troops in Tunisia removed the Axis presence from Africa forever.”
12. Conclusion: The Soft Underbelly Exposed
The North African Campaign was the proving ground for the Western Allies. It was where the British Army relearned how to fight a modern war and where the American Army received its baptism of fire.
Strategically, the victory secured the Suez Canal and the Middle Eastern oil fields, guaranteeing Allied energy security. It also cleared the southern shore of the Mediterranean, opening the “Soft Underbelly” of Europe to the subsequent invasions of Sicily (Operation Husky) and Italy. For Germany, it was a hemorrhage of elite units and aircraft that could have been used on the Eastern Front, sacrificed for a theater that Hitler never fully understood.
References and Further Reading
-
Comprehensive History: Atkinson, Rick. An Army at Dawn: The War in North Africa, 1942-1943. Henry Holt. (Pulitzer Prize winner, definitive text on the US role).
-
Rommel’s Perspective: Rommel, Erwin. The Rommel Papers. Da Capo Press. (Primary source journals/letters).
-
Battle of Alamein: Barr, Niall. Pendulum of War: The Three Battles of El Alamein. Pimlico.
-
Operational Analysis: Citino, Robert M. Death of the Wehrmacht: The German Campaigns of 1942. University Press of Kansas.
-
Gazala Analysis: Ford, Ken. Gazala 1942: Rommel’s Greatest Victory. Osprey.
-
Operation Torch: O’Hara, Vincent. Torch: North Africa and the Allied Path to Victory. Naval Institute Press.
-
Tobruk: Fitzsimons, Peter. Tobruk. HarperCollins.
-
Tank Warfare: Zaloga, Steven. Armored Thunderbolt: The U.S. Army Sherman in World War II. Stackpole.
-
Logistics: Van Creveld, Martin. Supplying War: Logistics from Wallenstein to Patton. Cambridge University Press.
-
Biography: Hamilton, Nigel. Monty: The Making of a General. McGraw-Hill.
-
Kasserine Pass: Blumenson, Martin. Kasserine Pass. Cooper Square Press.
-
French Role: Porch, Douglas. The Path to Victory: The Mediterranean Theater in World War II. Farrar, Straus and Giroux.
-
Museum Resource: The Tank Museum (Bovington). The North Africa Campaign.
-
Strategic Context: Weinberg, Gerhard. A World at Arms. Cambridge.
-
Article: Imperial War Museums. The 10 Things You Need to Know About the Battle of El Alamein.